Data
Guides and strategies
Media
Chapter 14: Restricted Secrets
Upon returning to the Navigation Room the SC will be surprised that you tracked down the Diffusion Missile, and will be quite put out that you unlocked Level 4 Security Doors without its approval, but heck, we would've been stuck if they'd remained locked. With that aside the SC will tell you that the rogue security robot you faced earlier has been infected by X and has had its organic components taken over.
We'll now have to track it down in Sector 6 (NOC) and destroy it completely before it causes too much havoc. Leave Sector 4 and head over to Sector 6. When you reach the Navigation Room the SC will hastily tell you to leave Sector 6 immediately after taking down the robot as the SA-X is actively tracking Samus now. So we'll need to tread lightly and take this robot down quickly. Go right in the Recharge Room and head through the next large purple room. Watch out for the flying bugs along the way, then head through the door on the right.
Traverse through the next dark room and through the following corridor to reach the large dark shaft leading down. We'll now find the path leading down to where the Security Robot's hiding. Descend the shaft and go through the door on the left wall about halfway down. Cross through this next blue X-infested corridor and lay a Power Bomb at the dead end to open up a path ahead. Go through the door on the left side of the corridor and drop down the next short shaft.
Head right and drop through the crumbling blocks near the door to reach a long open corridor partially filled with water. Once again we won't be able to backtrack up this shaft you've just fallen through so you'll need to find another way out.
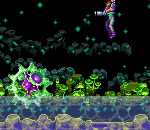
Go through the left door here and climb down the next cavernous Puffer-filled chamber. Head left and drop down the next shaft. On the floor below you'll find a door to the right leading to a Save Room, once you're ready shoot out the floor opposite the door and drop down further below. Go through the red door at the base of the shaft to find yourself in an unusual corridor. Walk forward to find the terrain dramatically change from a rocky contour to a research facility-type design.
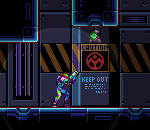
Walk over to the left and you'll spot a sign in the background saying "Caution Keep Out," so this place must be something significant. Walk up to the large shutter ahead and you'll hear a female voice continually repeat the words "Warning, no entry without authorization." Now you know you're in an area you shouldn't be in. Head back to the right and climb back up to the long corridor partially filled with water.
As soon as you enter the room the rogue Security Robot will slam in through the right and attack for a final showdown. Refer to the bosses guide for tips on finishing this crazy machine off. Fry the machine and absorb the Core X to recover the Wave Beam ability! Now you'll be able to shoot your Beam Weapon through walls, so passing through closed shutters won't be a problem from now on, you'll be able to open them up no matter which side you're on.
Go through the door on the right side of the corridor first to locate Missile S6.06 in a room beyond. With the missile secured head back down to the corridor where the "Keep Out" sign was. Shoot open the shutter with help from the Wave Beam and go left through the narrow tunnel ahead. You'll now be in the Restricted Zone, the voice will keep telling you that you shouldn't be here, but this is the only way we can get out of Sector 6.
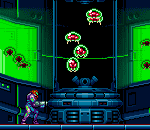
Drop down below and head left to find a Save Room. Save your game then go left. Cross the next darkened corridor to find yourself in a room with a view of the starry backdrop outside. You're now about to find out why this place is restricted. Go left to find yourself in the Restricted Laboratory, and you'll see why it's restricted by looking in the background. A huge glass tank adorns the background full of floating Metroid hatchlings!
Somehow the Federation has begun a breeding program and has managed to revive Metroids using the last infant Metroid from SM! So this is why that Federation officer contacted the SC earlier! Go through the left door ahead and climb up the next shaft, where you'll see normal, Alpha, Gamma and Zeta Metroids kept in stasis tanks. Not only have the Federation cloned Metroids, but the hatchlings are evolving just like the real ones found on SR388!
Climb up the shaft and go right to find yourself above the previous room below. Walk over to the wall ahead and you'll hear a door open up below and the sound of glass breaking. What's going on now? An alarm will begin to sound, quickly go back down below to find out what's causing the ruckus. Back in the room below you'll amazingly find the SA-X firing away at the massive tank containing the hatchlings, creating a mess while it is at it.
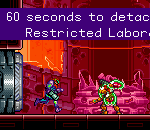
The glass will shatter and the hatchlings will naturally cling onto the SA-X, eager to devour the monster. The female computer voice will then issue a statement saying that in 60 seconds this lab will be locked down, so we've gotta get of here now! The roof will crumble, quickly Space Jump up past all the little hatchlings floating around the room and dash through the door at the top of the shaft to escape.
You'll now see a cutscene where the entire Restricted Lab detaches from the station before ultimately exploding out in space. It now looks like that's the end of the Metroid breeding program, as well as the SA-X. Go right when the game returns you to Samus to find a Navigation Room, it's time to face the SC. Although the SC is disappointed that you discovered the breeding program, it tells you of the entire operation the Federation was conducting. It then gives you more bad news, saying that another SA-X is on its way here.
It then reveals that the SA-X has reproduced itself, with now no fewer than 10 SA-Xs aboard the station. That's definitely not good news. The SC will then tell you to escape from this area, so we need to get going before the SA-X can track Samus down. Once the doors in the Navigation Room open up, go right and ride up the elevator you'll find.
Chapters:
- Back to the Freezer
- Tangled Twists
- The Nightmare
- Deep Sea Diving
- Restricted Secrets
- More Surprises
- Final Run
- Final Showdown


